Friday, February 27, 2015

Spring Duck Curvy Keepsake

I have another adorable little treat wrapper made with the Curvy Keepsake die to share. This time it's a bit of a spring theme, but he'll work great for any little kids' theme.

Isn't he just the cutest thing?  And he's very fast to assemble as there are few punched shapes and even less trimming of the shapes than most of my designs. Here is a quick side view.


This time I filled the wrapper with two York's Peppermint Patties. But as already noted with my previous treat wrappers, these can hold many different items.

Supplies used:
Cardstock: Bazzill
Ink: all SU - Daffodil Yellow, Tangerine Tango
Die: Curvy Keepsake - SU
Punches: various see below instructions
Misc.: foam mounting squares -  to attach the feet

Full instructions below.


Thanks for stopping by. Hope to see you soon for a "Toadally" sweet Springtime creation.

Wednesday, February 25, 2015

Birthday Clown Curvy Keepsake

At last I have a chance to share my clown Curvy Keepsake treat wrapper. I have to say he is my favourite so far. With his fun outfit and bright and cheery colours he's ready for a celebration.


And here's a quick side view. As you can see a TicTac package easily fits inside his tummy. I'm sure a little toy (the kind you can find in the dollar store party supply section) would fit really nicely as well.


Supplies used:
Cardstock: Bazzill
Ink: all SU - Rich Razzleberry, Blushing Bride, Daffodil Delight, Always Artichoke, Cherry Cobbler, Tangerine Tango
 Embossing folder: Argyle - Cuttlebug
Die: Curvy Keepsake
Punches: see full instructions below
Misc.: Black marker, red/rose blush for cheeks

 Full punch art instructions below:


Thanks for stopping by! Come back soon for great Spring inspired creations.

Monday, February 23, 2015

Baby Shower Curvy Keepsake

This sweet little baby treat wrapper would be perfect for a baby shower. He can easily be turned into a baby girl, or if the gender is still unknown use yellow, green or purple for the sleeper.


Mine is holding a pack of mint TicTacs, but any small candy or treat will work.
This little fellow is actually rather quick to put together once you've got the pieces punched.

Supplies used:
Cardstock: Bazzill
Ink: all SU - Marina Mist, Soft Sky, Blushing Bride, Crushed Curry.
Die: Curvy Keepsake - SU
Punches: see below detailed instructions
Misc.: black marker, red/blush chalk.

Full instructions below:


Thanks for stopping by! Hope to you see you again soon.

Sunday, February 22, 2015

Girl Curvy Keepsake Treat Wrapper

I Hope I didn't keep anyone waiting too long.
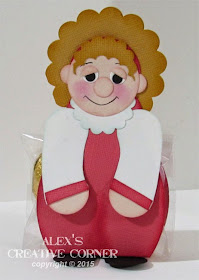
Here is the little girl treat wrapper made with the Curvy Keepsake SU die.


I think she'd be very cute for Easter (maybe have a her holding a large Easter Egg). Or how about a party invite. She could be holding a gift or balloon and the party details could be written on the back.. This also makes a great party favour and she can easily be turned into a little boy.

Here's a side and back view (yes, I finished the back of the head with another scalloped circle)

 
My wrapper is holding a clear baggie with 6 small Easter chocolates/eggs, but many little candy treats will work well for this. A small dollar store type toy would probably fit too.

Oops, forgot to note the  supplies used
Ink: all SU - Blushing Bride, Crushed Curry, Strawberry Slush, Soft Sky
Cardstock: Bazzill
Die; Curvy Keepsake - SU
Punches: - as note din the below instructions.
Misc.: blakc marker, red/rose blush (my white gel pen is dried up and I haven't had a chance to buy a new one so no highlights on this one)

Punch art instructions below:


Thanks for stopping by! Come back soon for my baby wrapper instructions.

Saturday, February 21, 2015

More Curvy Keepsake Treat Wrappers

I liked my little Leprechaun so much I decided to make a few more character treat wrappers using the Curvy keepsake die.

They are turning out rather cute so I thought I'd share a quick preview of the next three; a little girl, a baby and a fun birthday clown:


I am working on the instructions right now, so these will be up on the blog this week.

Also, these are just the beginning, I have several more in the works; so come back soon.

Thanks for stopping by!, Alex

Thursday, February 19, 2015

Leprechaun Curvy Keepsake Wrapper

I love how versatile the Curvy Keepsake die is. I used it to make this cute little leprechaun treat wrapper for St. Patty's Day.


His belly is holding a littel clear bag with 3 very large chocolate coins from his little pot of gold.
Here is a side view so you can see the treat a little better. A chocolate bar, pack of gum or other candy will work as well.


Supplies used:
Cardstock: Bazzill
Ink: Garden green, Cajun Craze, Crushed Curry, Blushing Bride, Old Olive - all SU
Die: Curvy Keepsake - SU
Punches: see instruction list below
Misc.: red chalk (cheeks), white gel pen  (mine is drying out as you can see), black marker (mouth)

Full instructions below:


Thanks for stopping by! Hope you come back soon for more paper creations.

Tuesday, February 17, 2015

Welcome Spring Window Card

We have had some very unusually mild weather here in Calgary in the past few weeks. It's making me very hopeful for spring (all though I am afraid to rock the boat so to speak).

That in mind I felt inspired to make something that said "spring". I've been seeing a lot of cards made using the new SU stamps et "Indescribable Gift". It is a lovely spring blossom branch that can be coloured with markers. I don't own it yet but thought I'd create something with spring blossoms.

This is what I came up with (I bet it would look even prettier with the SU stamp):


I don't have any blendabilities (or other alcohol marker). I used my regular SU markers to try an shade the blossoms a little. In actual fact I was not too happy with the results and almost threw the coloured image away when my daughter advised she loved it and would like a card made with it.
So this little gem was born. I do love the window die and think it works really well with this image.

Here is a  peak at the inside of the card, which I made to match.

Supplies used:
Cardstock: Bazill
Ink/Ink Markers: Blushing Bride, Rich Razzelberry - SU, Early Espresso
Stamps: Asian inspired - Fiskars, Easter Blossoms - SU
Embossing folder: Brick - Tim Holtz
Die: Door/Window - Impression Obsession
Misc.: Foam mounting squares, 2 x 1/8" silver brads.

Thanks for stopping by! Come back soon for some St. Patrick's day creations.

Friday, February 13, 2015

Party Time

I used all 4 cocktail designs from the last 4 days to make the matching birthday card to my tags.
The set turned our really great and I am very hopeful my sister will like it.


I chose a simple white background for the card as well, but opted for a step card for a little more drama. I also popped two of my glasses using foam mount. Note I trimmed foam tape it into very thin strips so that there is a little behind the base as well as the stem.

Originally this card did not have any bling. It  was definitely missing something. Once I add my "bubbles" it all came together.

Thought I'd show a side by side comparison, without bling and with bling.


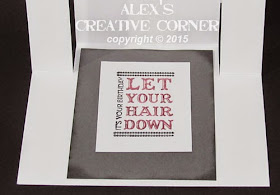
I finished the inside of the card to match:


Supplies used:
Cardstock: Bazzill
Ink: So Safron, Crushed Curry, Cherry Cobbler, Soft Sky, Pistachio Pudding, Basic Gray, Basic Black - all SU
Ink markers: Cherry Cobbler, Basic Black - SU
Stamps: Let Your Hair Down - SU
Misc.: foam mounting tape, 3 sizes of rhinestones (1/16", 1/8" 3/16"),

Full punch art instructions can be found in my previous 4 posts:

Ceasar/Bloody Mary:
http://alexscreativecorner.blogspot.ca/2015/02/caesar-or-bloody-mary-cocktail.html

 Margrita/Daquari:
http://alexscreativecorner.blogspot.ca/2015/02/margarita-ville.html

Martini:
http://alexscreativecorner.blogspot.ca/2015/02/after-dinner-martini.html

Pina Colada/Chi-Chi:
http://alexscreativecorner.blogspot.ca/2015/02/pina-colada-cocktail.html

 Thanks for stopping by! Hope to see you again soon.

Thursday, February 12, 2015

After Dinner Martini

Last but not least, my sisters favourite drink, a Martini (or you could change the colour and add a cherry to turn this into a Manhattan).


This is again on a simple white background but then inked the edges of the glass with a little light blue to help it pop from the background a little. Everything is glued on top of the glass to try and give a bit of an illusion that there is glass, somewhere.
I also popped my glass using foam mount. Note I trimmed it into very thin strips so that there is a little behind the base as well as the stem.

Supplies used:
Cardstock: Bazzill
Ink: Pistachio Pudding, Soft Sky, Basic Gray, Basic Black - all SU
Die: Two Tags - SU
Stamp: Vintage Frames - SU
Misc.: foam mounting tape, 1/4" dark gray eyelet, 3 sizes of rhinestones (1/16", 1/8" 3/16"), 3/8" black gingham ribbon

Full punch art instructions below:


Thnaks for stopping by. Hope to see again soon

Wednesday, February 11, 2015

Margarita Ville

Today's cocktail is a berry Margarita (or if you prefer rum over tequila, a Daiquiri).
This is another drink that I like (I prefer something a little sweeter).


I opted for a simple white background but then inked the edges of the glass with a little light blue to help it pop from the background a little. Everything is glued on top of the glass to try and give a bit of an illusion that there is glass, somewhere.
I also popped my glass using foam mount. Note I trimmed it into very thin strips so that there is a little behind the base as well as the stem.

Supplies used:
Cardstock: Bazzill
Ink: Cherry Cobbler, Garden Green, Soft Sky, Basic Gray, Basic Black - all SU
Die: Two Tags - SU
Stamp: Vintage Frames - SU
Misc.: foam mounting tape, 1/4" dark gray eyelet, 3 sizes of rhinestones (1/16", 1/8" 3/16"), 3/8" black gingham ribbon

Full punch art instructions below:


Thanks for stopping by! Hope to see you again tomorrow for an after dinner Martini.

Tuesday, February 10, 2015

Caesar (or Bloody Mary) Cocktail

My Second cocktail punch art tag is the my dad's favourite, a Caesar, or for those that don't live in Canada, it's almost the same thing as a bloody Mary (just add Clamato juice).
This could also very easily be turned into a Long Island iced tea (my daughter's favourite) by changing the colour and adding a lemon slice instead of the celery stick.
This is a rather simple one if I do say so. I didn't fuss too much with the celery stick either, but I think the basic idea is there.


Again I opted for a simple white background but then inked the edges of the glass with a little light blue to help it pop from the background a little. Everything is glued on top of the glass to try and give a bit of an illusion that there is glass, somewhere.
I also popped my glass using foam mount. Note I trimmed it into very thin strips so that there is a little behind the base as well as the stem.

Supplies used:
Cardstock: Bazzill
Ink: Chocolate Chip, Pistachio Pudding, Soft Sky, Basic Gray, Basic Black - all SU
Die: Two Tags - SU
Stamp: Vintage Frames - SU
Misc.: foam mounting tape, 1/4" dark gray eyelet, 3 sizes of rhinestones (1/16", 1/8" 3/16"), 3/8" black gingham ribbon

Full punch art instructions below:


Thanks for stopping by. Hope to see you again tomorrow for "Margarita Time".

Monday, February 9, 2015

Pina Colada Cocktail

February is a busy birthday month for us. First up is my sister, late in the month my dad and in between a few friends.

My sister is a bit of a party girl so I thought this years card should reflect that a little.
I came up with several cute cocktails that I am using on her gift tags as well as the card; a matching set so to speak. I will share a tag each day this week, followed by the card on Friday.

Up first one of my favourites, the Pina Colada (or if you don't like rum and prefer vodka, a Chi-Chi).


I wasn't sure if I liked the white glass so I tried it with vellum, which was too milky. Then I opted for window sheet. A little harder to punch and just awful to glue. Looked like a mess no matter how careful I was with my Mono Multi. So white glasses it is.


I opted for a simple white background but then inked the edges of the glass with a little light blue to help it pop from the background a little. Everything is glued on top of the glass to try and give a bit of an illusion that there is glass, somewhere.
I also popped my glass using foam mount. Note I trimmed it into very thin strips so that there is a little behind the base as well as the stem.

Supplies used:
Cardstock: Bazzill
Ink: So Safron, Crushed Curry, Cherry Cobbler, Soft Sky, Basic Gray, Basic Black - all SU
Die: Two Tags - SU
Stamp: Vintage frames - SU
Misc.: foam mounting tape, 1/4" dark gray eyelet. 3 sizes of rhinestones (1/16", 1/8" 3/16"), 3/8" black gingham ribbon

Full punch art instructions below


Thanks for stopping by, check back tomorrow for another fun cocktail tag.

Friday, February 6, 2015

I "Roar" for You

If you are wild about that special someone this is the perfect card for Valentine's.
This lion was created when I first made my honey bear last month. I struggled for quite a while on the card front but finally came up with this jungle like theme.


This was the first time I used my hexagon hive die and I have to say it was a touch die to get to work; but it does look rather nice as a background. The little lion is pretty fast and easy to put together and only used 3 punches.

Supplies used:
Cardstock: Bazzill
Ink: Chocolate Chip, Crushed Curry, Pear Pizzazz, Early Espresso, Basic Black - all SU
Stamps: All Around Alphabet (I) - SU, Rummage (roar) - MM,  Vintage Frames - SU, Gorgeous Grunge - SU, Secret Garden - SU
Dies: Hexagon Hive - SU, Secret Garden - SU
Punches (other than punch art lion):  Hexagon - SU, Itty Bitty Shapes (4 petal flower) - SU
Misc.: Foam mounting squares, white gel pen, red chalks, black marker, 7 1/8" gold rhinestones.

Full punch art instructions below:


Thank you for stopping by. Hope to see you again soon!

Wednesday, February 4, 2015

Horse Treat Wrapper

I have one more"animal face" themed treat wrapper to share. This one is a studly horse (or you could easily turn him into a bull or cow as well).

He comes together just as fast as my previous treat wrappers and of course he was made using the Curvy Keepsake die.


Supplies used:
Cardstock: Bazzill
Ink: Chocolate Chip, Sahara Sand, both SU
Dies: Curvy Keepsake - SU, Oval Framelits - SU
Punches: Large wide oval (muzzle), Boho Blossom (largest, mane), Fun Flower (ears), Owl Builder (smallest circle - nostrils) - all SU,  3/4" circle (eyes & lids) - PB, 1/2" circle (pupils) - PB,
Misc.: white gel pen

Notes: Only cut two "handled" sides of the box die. Trim the bottom to approx. 3/4" (just enough to accommodate a treat/candy bar. Glue the handles together.
The oval shape used for the head was trimmed approx. 1/2" straight across one short end and lines up with my wrapper to create the head. For the muzzle I trimmed my large, wide oval a bit at the bottom to give it an inner curve.

Thanks for stopping by. Hope to see you again soon.

Monday, February 2, 2015

Little Piggy Treat Wrapper

I am sharing another Curvy Keepsake treat wrapper today. This time it's a sweet little piggy.
He was a little trickier to make due to the snout, but I still like how he turned out.


This little pig can hold a small bag with candy, kisses etc. or a chocolate bar. He's great for Valentine's as well as a party favours.

Supplies used:
Cardstock: Bazzill
Ink: Smokey Slate, Crisp Cantaloupe - both SU
Dies: Curvy Keepsake - SU, Oval Framelits (3rd smallest) - SU
Punches: 1/2" circle - PB (pupils), 3/4" circle - PB (eyes and lids), 1 1/4" circle - PB (snout), Owl Builder (medium circles) -SU (nostrils, Pennant Builder - SU (ears)
Misc.: white gel pen

Notes: Only cut two "handled" sides of the box die. Trim the bottom to approx. 3/4" (just enough to accommodate a treat/candy bar. I bent the handles towards each other and glued the snout on top. I did have to trim the corners of the handles so that nothing sticks out from under the snout.
The oval shape used for the head was trimmed approx. 1/2" straight across one short end and lines up with my wrapper to create the head. I also curled the tips of the ears a little so they droop down.

Thanks for stopping by. Hope to see you again soon.