Sunday, September 23, 2012

Bottle Cap Key Chains

For now, here's my last bottle cap creation (am planning on more for Christmas).
These are a couple of cute key chains I made for my youngest.

As before, I flattened the bottle caps using my Sizzix. The images were prinetd on white caed stock and punched out with a 1" circle punch. The have been covered with Ranegrs Glossy Accents for a nice shiny finish.

I punch a hole in the top using my handheld 1/16" hole punch (Fiskars). I the used 2 silver 3/8" jewellery rings and a key chain clip on each.

They'll look great hanging on the zippers of Josh's backpack.
 

Sunday, September 16, 2012

Bottle cap magnets

My next batch of bottle caps is a pretty big one. I'm planning on making magnets out of most of them.


See any you like? These aren't quote done yet. I've only glued the images on and still have to cover them all with glossy acents.

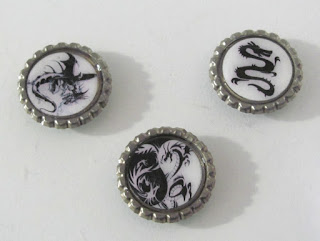
Here are three that are completed (my kids all love dragons):


I'm thinking of making a few more like these and instead of magnets I'll turn them into key chains.

Monday, September 10, 2012

Bottle Cap Rosettes

I've been crafting with bottle caps for about 10 years now, and it never seems to grow old.
If you are ok with gold and silver and don't care about the little rubber liner, you can get them really cheap at any wine making store. A bag of about 200 is around $12.00.

They can be flattened using a rubber mallet, or if you have one, use your Sizzix. I flatten 3 at a time using my red Sizzix with the sizzlets adapter attached. It's fast and easy, and always flattens nicely.

I'm making several stocking stuffers with these this year so lot's to prepare.

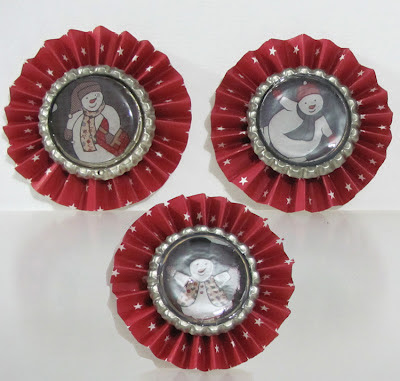
Here's the first batch. I made little rosettes with them. These will be strung to use as ornaments. I plan on attaching them to cards I will send out.


I used silver bottle caps on these. The images are punched with a 1" circle punch from a Christmas tag. After gluing the images into the cap I covered them with Ranger's Glossy Accents and let them dry 24 hrs. Each rosette was made from a 12 x 1" strip of patterned paper. I scored the strips every 1/4" and folded them accordion style. The centers were glued onto a 1" circle punch out with my glue gun. I then attached a bottle cap to each centre, again with my glue gun.
 
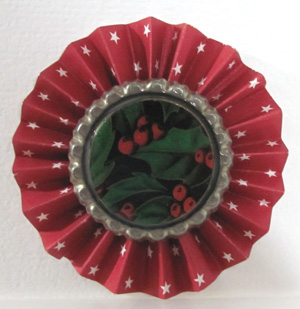
Here is one more made from an old Christmas card (I have 4 more like this one)
 
 
This is a great way to recycle old tags and cards, and they look really cute. Use them to make cards, ornaments or as a bow on top of a gift box. They'd work great on a scrapbook layout as well.

Sunday, September 9, 2012

Give Thanks

Our next holiday is fast approaching, only 4 weeks till Thanksgiving! Well, for us Canadian's anyways :)
With most of our relatives overseas, it's generally just my sister and her husband joining us for Thanksgiving dinner. That makes 7-8 so I though this year I'll decoate the table a little more than usual.

I have been working on some simple homemade table decorations. Place cards, napking rings, goody boxes (these will hold homemade truffles) and decor wrap for the candles.

 
And of course I couldn't resist and made a matching card.
I am also contemplating a little menu for each plate setting, but I haven't quite decided yet.
 
The design is really simple. I only used 3 punches for the acorn. The S. giant fern (PB) for the greenery and bot the top and acorn are made from the SU ornament punch. I double punched the top. First I punched the s. giant oval (PB) form the cardstock/paper and then the ornament.
For added texture I used an embossing envelope on the brown for the top.
I left my acorns simple, but they'd be really cute with a face as well, see below.
 
 
I accented each piece with a little natural raffia bow and all edges are inked.
Here's a close up of the card:
 
Related Posts Plugin for WordPress, Blogger...